
Mac mini M4 SSD installation guide
A step-by-step guide to installing your 2TB SSD upgrade using the Torx T3, T5, T8 and opening pick included free with your order.
What you'll need
Make sure you have everything ready before starting
Tools required
- T3 Torx - Fan screws (2x)
- T5 Torx - Inner plate & fan screws
- T8 Torx - SSD screw
- Opening pick - Bottom cover & prying the SSD
Hardware
- Your Mac mini M4 (base model only)
- 2TB SSD upgrade module (included in your order)
- USB-C to USB-C cable for data and charging (not included; Apple says not to use a Thunderbolt 3 cable)
- A second Mac with macOS 14 or later, power, internet and free space for the download
Software
- Finder on the second Mac (no extra app needed for Apple's current instructions)
- macOS installer (will download automatically)
- A completed Time Machine backup (required before the swap)
Important: read before starting
- •This installation is ONLY compatible with the base Mac mini M4. M4 Pro models use different storage architecture.
- •Back up all your data before starting. While the installation is safe, data loss can occur during restoration.
- •The installation process will erase your current drive. Make sure you have a complete backup before proceeding.
Installation steps
Follow these steps carefully for a successful installation
Back up your data
Before starting, create a complete Time Machine backup of your Mac mini. Connect an external drive and go to System Settings > General > Time Machine. Start a backup and wait for it to complete.
Warning
Don't skip this step. A backup lets you recover your data if something goes wrong.
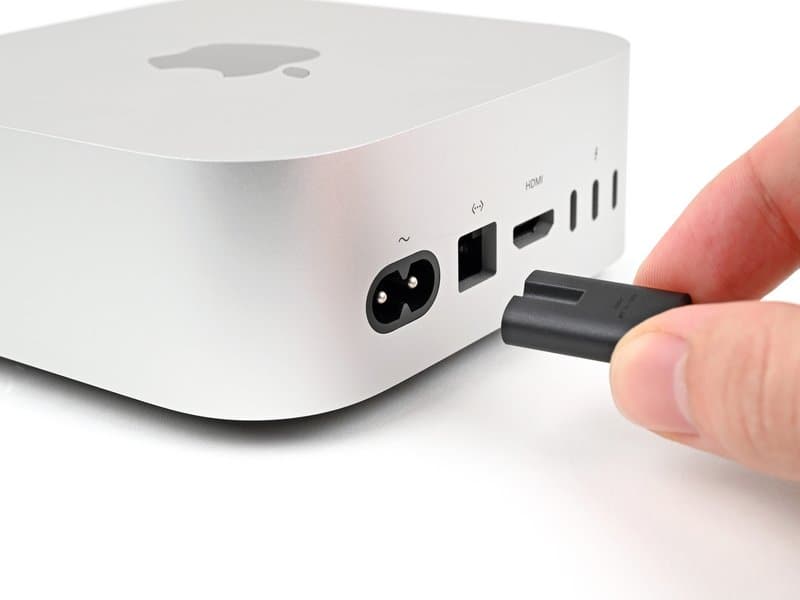
Shut down your Mac mini
Completely shut down your Mac mini:
- Click the Apple menu in the top-left corner
- Select 'Shut Down' and wait for the system to power off completely
- Flip over your Mac mini and place it on a clean, flat surface
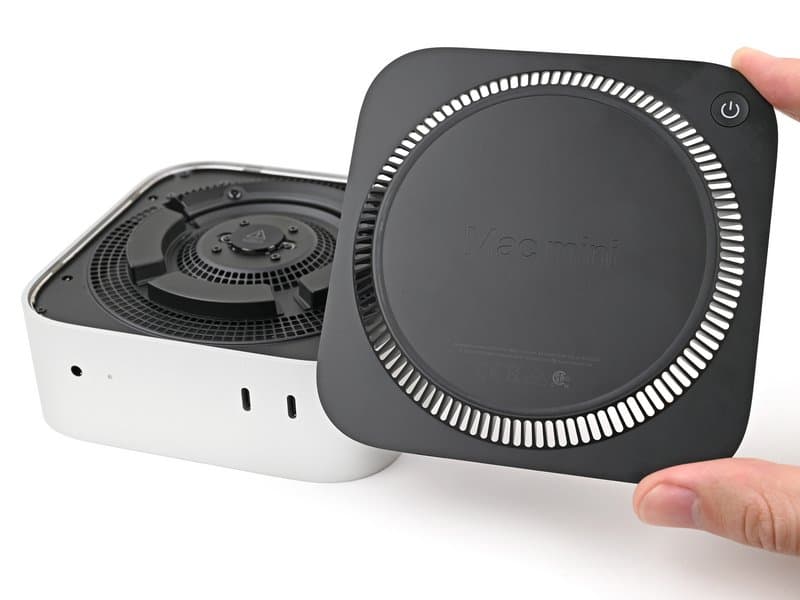
Remove the bottom cover
The bottom cover is held by four corner pins. Use the included opening pick to release them:
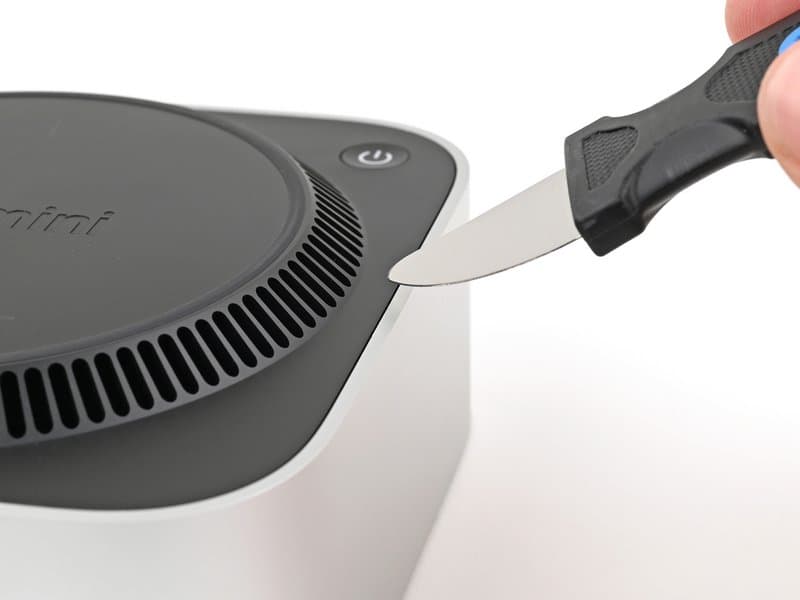
Insert the opening pick into the gap between bottom cover and chassis
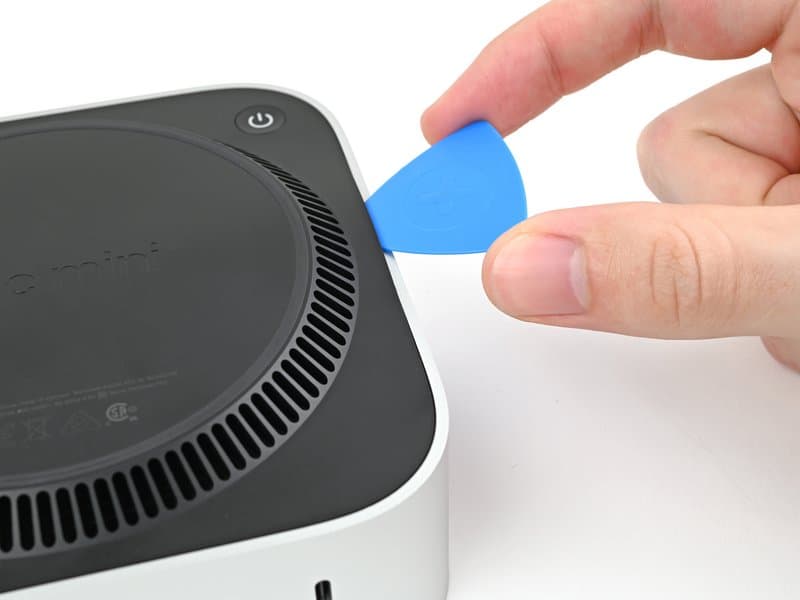
Slide pick along perimeter, twist to release each of the 4 corner pins
Pro tips:
- Use the opening pick in vent holes to avoid scratching aluminum
- Keep pick less than 1 inch from power button to avoid cable damage
- Listen for an audible click when each pin releases
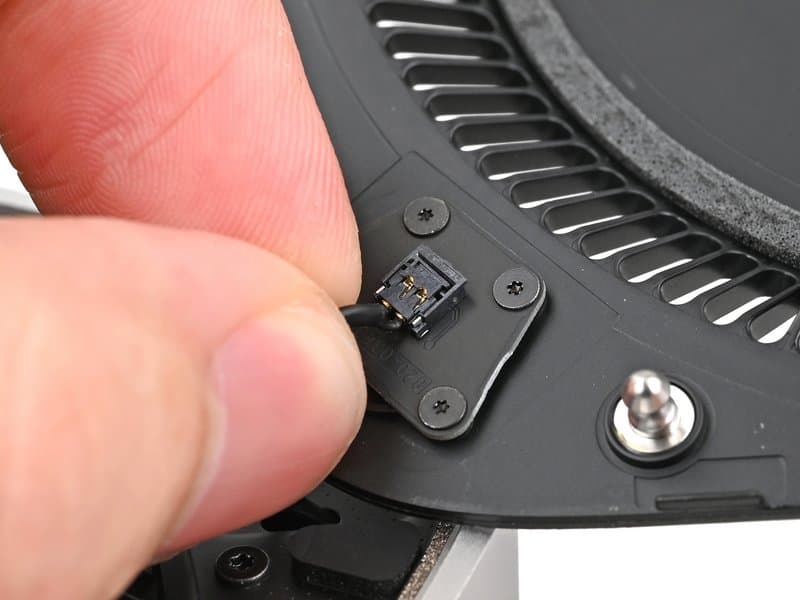
Warning
The power button cable is fragile! You can prop up the bottom cover instead of disconnecting it.
Remove the inner plate
Remove the inner plate to access the fan and SSD:
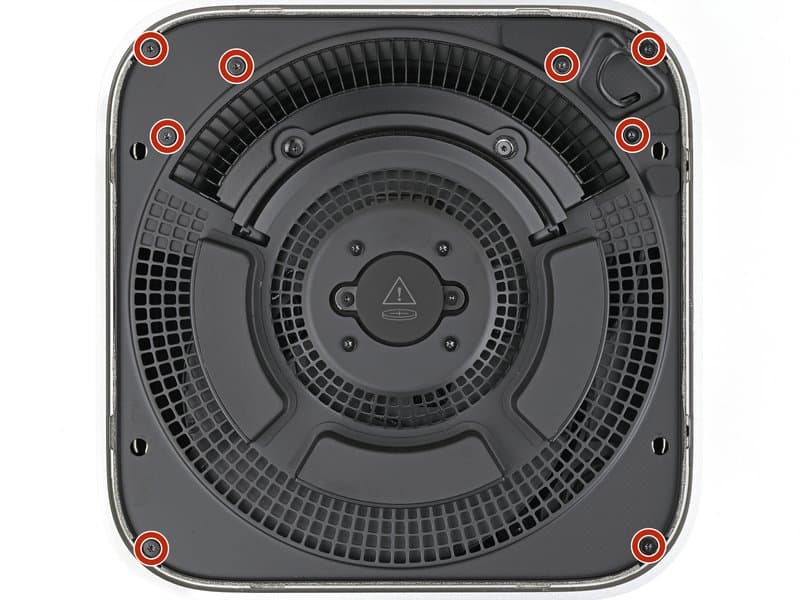
Remove the 8 x 3.4mm T5 Torx screws (track each position!)
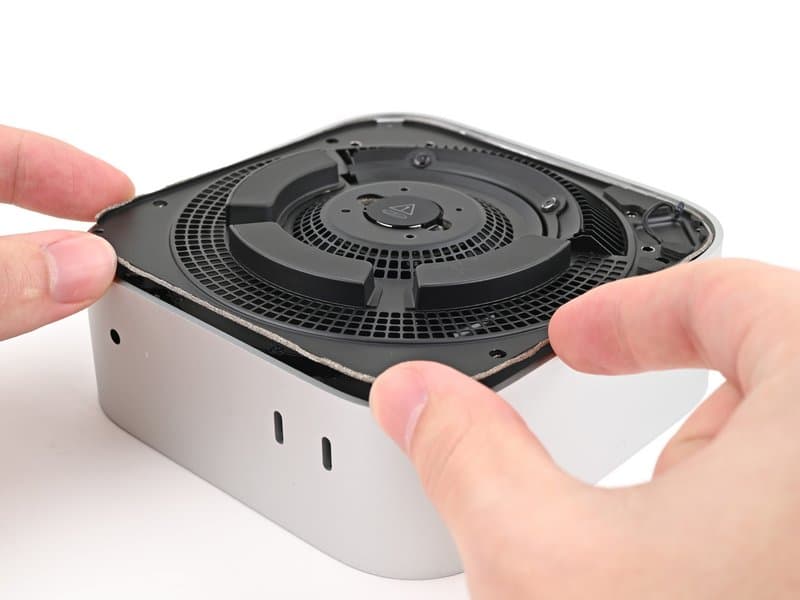
Pry up the plate using clip slots, then flip it over (cable still connected)
Required tools (included free):
- T5 Torx - for inner plate screws
- T3 Torx - for 2 x 2.4mm fan screws
- T5 Torx - for 2 x 7.9mm fan screws
- T8 Torx - for 1 x 4.1mm SSD screw
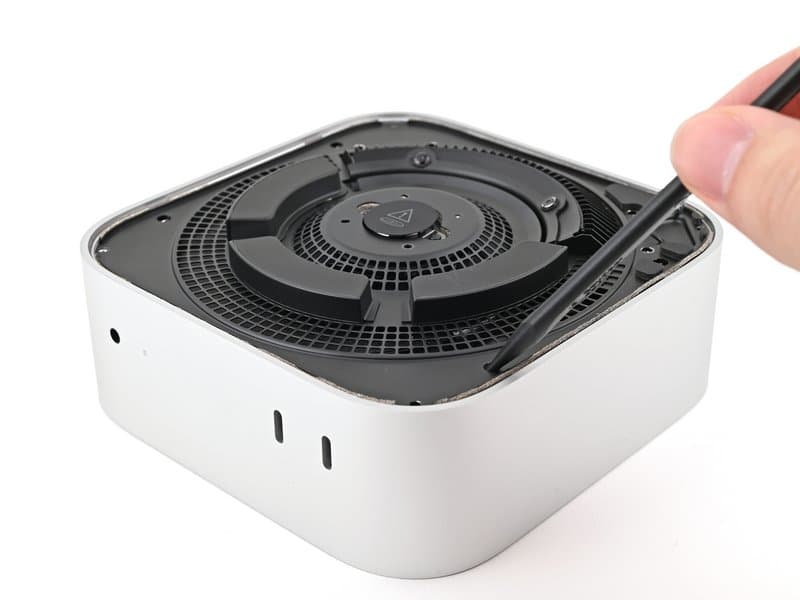
Tip
Apply constant downward pressure on Torx screws to prevent stripping. A magnetic mat helps organize screws.
Remove the fan
The fan must be removed to access the SSD:
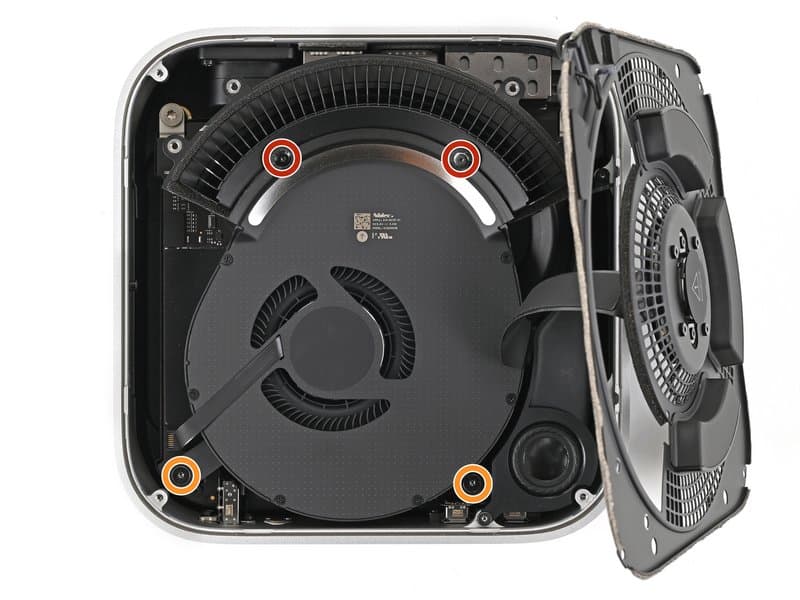
Remove 2 x 2.4mm T3 screws and 2 x 7.9mm T5 screws
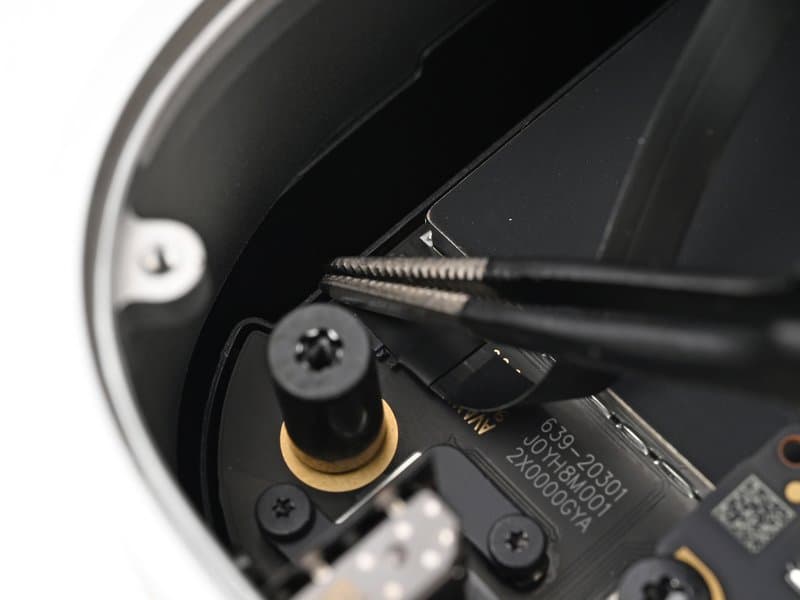
Peel back tape, flip up ZIF locking tab, slide cable out
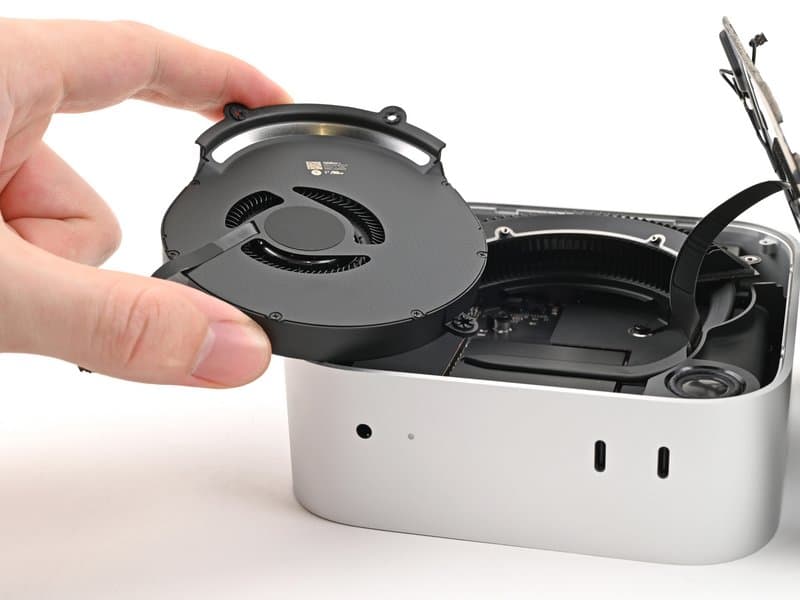
Tip
The fan ZIF connector has a locking tab - flip it up before pulling the cable, then slide straight out.
Install the SSD module
Now you can access and replace the SSD:
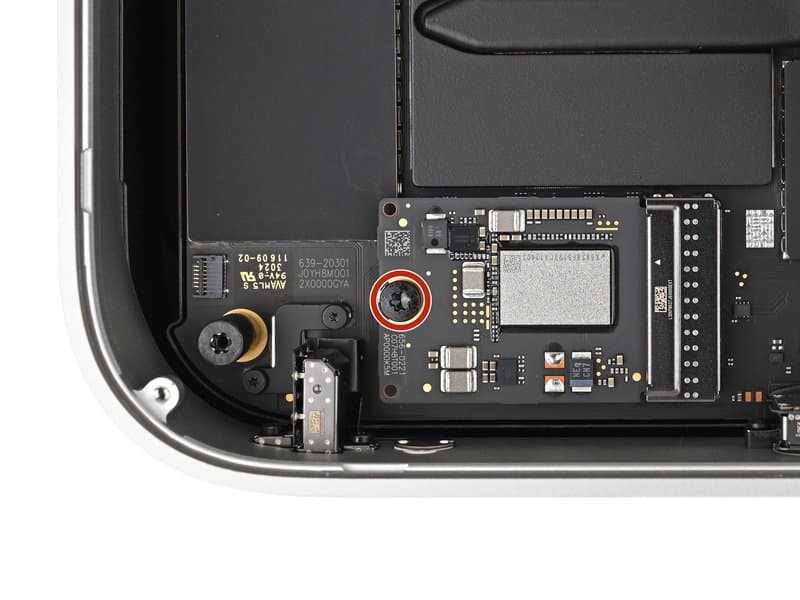
Remove the 4.1mm T8 Torx screw securing the SSD
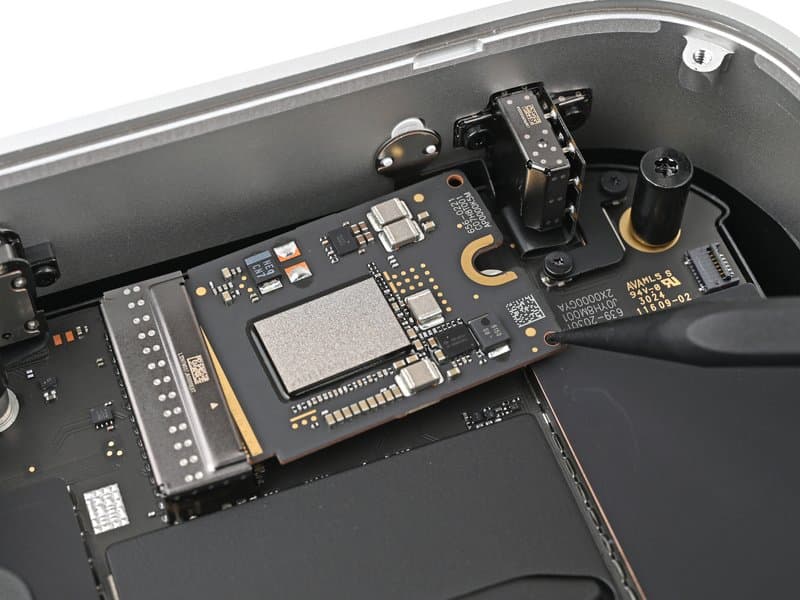
Use the opening pick in access holes, alternate sides when prying
SSD removal & installation:
- Removal: Insert the opening pick into holes along SSD bottom edge
- Alternate sides when prying to avoid tilting the SSD
- Installation: Insert new SSD at a 30-degree angle
- Gently wiggle it into place until it sits completely flat
- Never force - if it does not slide in easily, check alignment
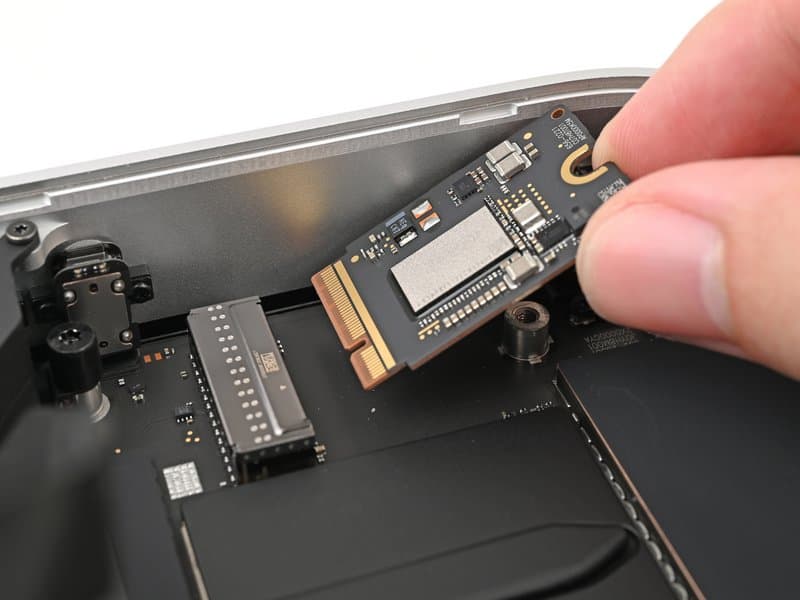
Warning
Do not force the SSD. If it doesn't go in easily, check the alignment and try again.
Close the Mac mini
Follow the disassembly steps in reverse order:
Reassembly checklist:
- Secure SSD with T8 screw
- Reconnect fan cable (slide into ZIF, flip tab down)
- Replace fan screws (2x T3, 2x T5)
- Reattach tape over fan connector
- Slide inner plate under heat sink lip, secure with 8 T5 screws
- Reconnect power button cable if disconnected
- Align bottom cover pins, press until all 4 click
Enter DFU mode & restore with Finder
To initialize your new SSD, follow the current Finder restore steps on a second Mac:
Apple's restore instructions · Apple's Mac mini DFU-port chart
- On a second Mac running macOS 14 or later, open Finder and connect the Mac to power and internet
- Connect a USB-C cable for data and charging directly from the second Mac to the leftmost rear USB-C port of the Mac mini (facing its back); no hub or Thunderbolt 3 cable
- Unplug the Mini's power for 10 seconds. Hold its power button while reconnecting power; release when Finder shows the DFU window (up to 10 seconds). If asked to allow the accessory, release the button and click Allow. The Mini's screen stays black
- In the DFU window in Finder, select Restore Mac, not Revive Mac. Wait for the download and restart before migrating your Time Machine backup
Tip
If the DFU icon does not appear, check Apple's designated DFU port and try another data-capable cable. Do not guess a different Mini port.
Restore from backup
Once the restore is complete, your Mac mini will restart. Follow the setup assistant and choose to restore from your Time Machine backup. Your Mac mini will be exactly as you left it, now with 2TB of storage.
Watch the whole upgrade
iFixit filmed the complete procedure on a Mac mini M4: opening the case, swapping the module and the DFU restore. The video may show an older app; follow Apple's linked instructions for the current Finder steps.
Video by iFixit, an independent repair site. Shown here with a link to the original on YouTube; we are not affiliated with iFixit. Open on YouTube
The video does not replace steps 8 and 9 above: after the swap, the restore and the Time Machine migration still apply. Our DFU restore guide walks through them separately. DFU restore guide
Troubleshooting
Mac mini won't turn on
During DFU the Mini's screen stays black. If Finder shows no DFU window, check power and the DFU steps first. Only if those fail, unplug power and check that the module is seated; never open a powered Mac.
Finder doesn't show the DFU window
Use only the Mini port Apple designates for DFU, connect directly to the second Mac with a data-capable cable, and redo the unplug/hold/reconnect sequence. Try another cable or a different port on the second Mac, not an arbitrary port on the Mini.
Installation successful but storage not showing
If Finder reports an error, record its code and follow Apple's restore troubleshooting. Don't erase or format an unidentified disk in Disk Utility; contact support if the new capacity is still missing after a successful restore.
System running slower after installation
Check Activity Monitor for indexing or migration still in progress, then restart and test again. If it persists, contact support with a description of what feels slow.
For the DFU port, Finder sequence and current troubleshooting, follow Apple's revive or restore instructions If Restore fails, note the error code before contacting us.